Saturday, April 25, 2015

Design Team Call for Tiddly Inks!

Happy Saturday everyone!

This week, I have created a simple card for submission to the Tiddly Inks Design Team Call.  I started with the Super Pup digital stamp from Tiddly Inks.

I started by printing several sizes of the Super Pup and coloring him with my Spectrum Noir markers.  I loaded him onto my Silhouette PixScan mat to trace and cut all three out.  You can see a great tutorial for this technique here.

Once he was all cut out, I set him aside and loaded some cardstock and cut some stitched clouds.

I used some cloud cut files from the Silhouette Design Store, created a small offset and set the offset cut line to perforated to give the illusion of stitched clouds.  After pulling up the paper, I ran the sheet through my Sizzix BigShot using the Rectangle from the Simon Says Stamp Stitched Bundle die.


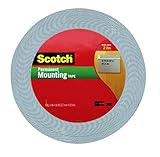
To assemble the shaker portion of the card, I cut some clear acetate and adhered it to my card face.   I cut some strips of 3M Mounting Foam Tape and doubled it up to make deeper wells for my shaker components and added some sequins from Pretty Pink Posh and So Suzy Stamps.


I peeled off all of the paper from the mounting tape and added a backing sheet to the shaker.  I added my Super Pup popping him up with some foam tape, my sentiment from Avery Elle's Furry Friends stamp set and added a little bit of Wink of Stella Clear Glitter Brush Pen to my pup and added the whole thing to some light blue cardstock cut to 4 1/4 x 5 1/2.


The supplies I used are listed below or linked in the blog post.  Thanks for stopping by and Keep Crafting Real!


Saturday, April 11, 2015

Simon Says Stamp April 2015 Card Kit

Happy Saturday!

I finally sat down today and started working on my crafting.  I had some great inspiration from the Simon Says Stamp April Card Kit.

This month's card kit revolves around the Big Birthday Wishes Stamp set.
The kit includes Pinkfresh Studios Rub-Ons (Up In The Clouds and an exclusive design for SSS) and Washi Tape, a beautiful iridescent green, pink and gold color.
Also included were these beautiful foiled craft papers.  I am already envisioning my next project using these!
Several pieces of cardstock in colors coordinating with the washi tape and rub-ons finished out the contents of the kit.
For my project, I started with some standard white cardstock and used a technique for ink embossing using a Darice embossing folder and Color Theory inks Going Green and Yes Peas.
I then colored the inside of the embossing folder, on the flat side with valleys and ran it through my BigShot.
I screwed up the first time, running the paper through left only half of the paper covered in ink so I had to change my platform on my BigShot to make it just a tad thicker.  The embossing folder didn't want to go through when I did that, but I kept pushing it through and got better but not perfect coverage.
 
I tried to use a paintbrush to color in some of the areas that weren't covered but quickly realized I'd not finish by the end of the weekend if I did it that way, so I opted to leave it.  I took the Yes Peas darker green and VERY LIGHTLY rubbed the ink pad over the raised parts of the paper.  I got some of the ink inside the valleys but forged on.
So I totally forgot to shoot pictures of the next phase.  I used a We R Memory Keepers Magnetic Twist Trimmer Combo to cut a scalloped edge about 3/4 of the way down the paper.  I decided to add it to a mint cardbase, cut to 4 1/4" x 5 1/2".  I used my MISTI tool to line up the paper and my sentiment.
I attached the paper to the cardbase after stamping and then I cut a piece of vellum to 3" x 4" and stamped another sentiment using VersaMark ink and then added Recollections embossing powder to the sentiment and heat set it.

At this point,  I was a little dissatisfied with the vellum, I thought it was too plain, so I ran the vellum edges along the VersaMark pad, added the same embossing powder and heatset that to add some dimension.
I added washi tape to the top and bottom of the piece of vellum and then I adhered the vellum to my card using Tombow Mono Adhesive behind the words and my tape runner along the back following the washi tape.  I like to put my adhesives behind other elements on my vellum sheets so the adhesive doesn't show through.  My completed project appears below.
Not my favorite card, but it's not terrible.  LOL

Stay tuned for another project coming soon!

Until then, keep crafting real!